Making a cardboard cutout in 3D without lifting a big fat finger.
A quick tutorial and file :)
----~~oOo~~----
Howdy folks.
I had a problem while working on a super secret project, where I needed to generate a large amount of pretty realistic cardboard cutouts.
It's a funny problem to have, and there are some decent tutorials that got me pretty close online, but I figured I'd take a dive back into Blender's fun Geometry Nodes system and try to figure it out. I got a solid end result, so here are my results in case anyone else also has this funny problem. I guess in the end, you don't solely need to make virtual cardboard cutouts with this, it generates 3D geometry based off of any transparent-background image (PNGs), but you know.
Getting Started ™️
First things first, I'm going to skip the process of making your cardboard cutout in photoshop, since again, you might already have a transparent image on hand. Here's what I'll be working with, grab it if you want to follow along:

Did you feel that? Those goosebumps will go away soon.
Now take your cool transparent image and keep it somewhere safe for now. Let's open up Blender.
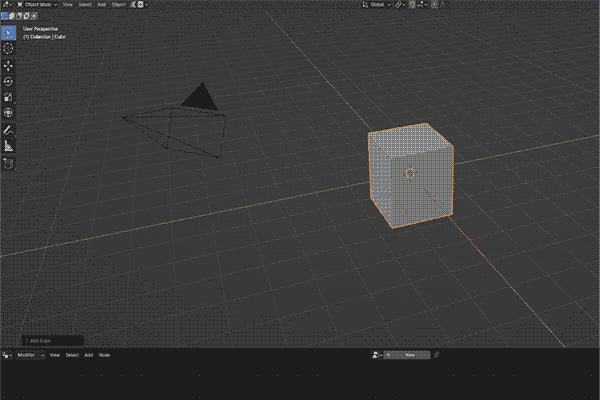
Default set up. Easy. Open up a new Geometry Nodes window like I did and then with your default cube selected, click New. Now,
I'm going to do a lot of step by step description with the occasional image, so follow along here and check your work at the image checkpoints!
With your new Geometry Node in the editor window, go ahead and delete the Group Input node, as we don't need that currently. Your cube will dissappear, and that's good. We're going to replace it with a Grid.
Shift+A > Grid (Mesh Primitives). Let's change the X and Y to be a bit larger here, like 4m. The important part is the amount of Vertices, as this defines the resolution of our cutout. I pumped this up to 100 on both to start.
We're gonna need more geometry than this though, so let's Shift+A a Subdivide Mesh node and stick it right after the grid. What's cool about this, is we can keep it at 1 for now if we're doing this on a slower computer, and then bump it up to 4 (or whatever) to give us a ton more geometry to play with when it's time to render!
Next, we'll Shift+A a "Delete Geometry" node - the idea here being we want to delete all of the vertices that are not representing our image. To do that, we Shift+A an Image Texture and connect our PNG, in this case, the prince of edge and cool CDs.
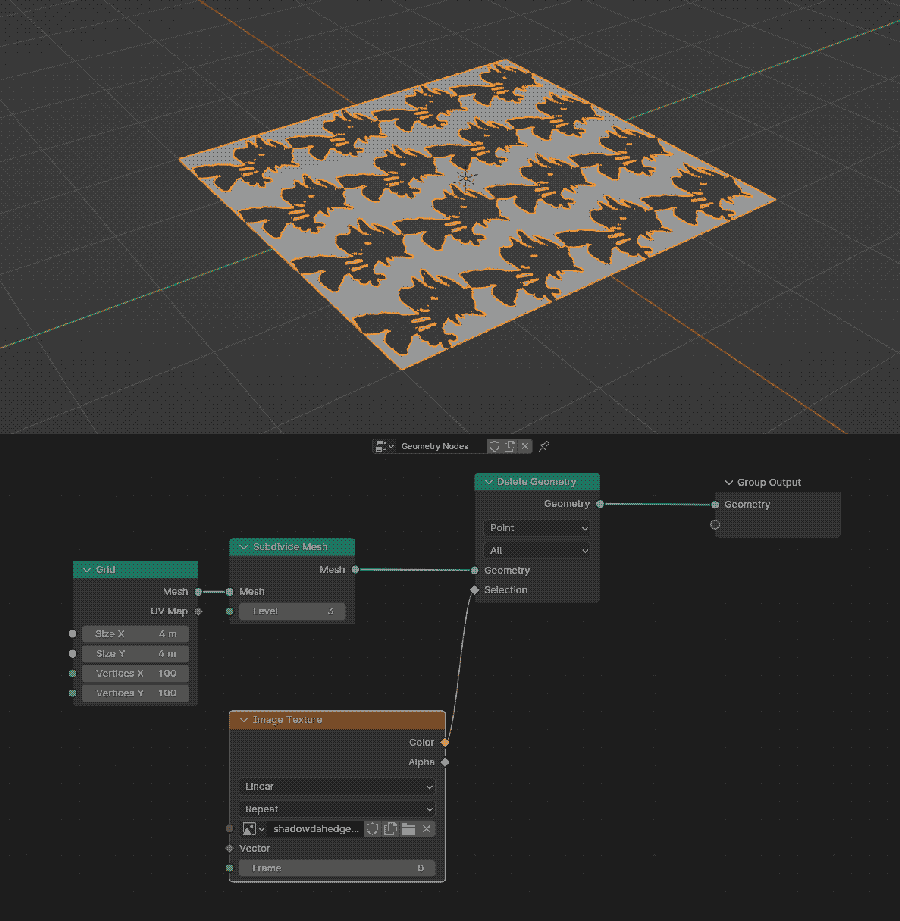
You should be seeing something like this, now.
Kinda looks like shit though. Let's fix that. First, click on your Image Texture and change it from Repeat to Clip. This will make sure we only have one of our image.
Shift+A Compare Node, drop it between your Texture and Delete Geometry node,and it should come out saying "Greater Than". Go ahead and change that to "Less Than", unless you just want to keep the image as a hole punch instead of a proper cut out. (I think if you had a black background for your image, Greater than might be the approach, but someone else can test that for me.)
In the B row of the Compare / Less Than node, alter that number until you get a proper cutout with as close to zero holes in the geometry. I've had to do 0.1, I've had to do 0.000001, it just depends.
Now your image might be off kilter or not directly centered, pissing us all off immensely. Easy fix. Shift+A > Position node, and connect it to the Vector input on your Image Texture, then move it WAY over to the left in your node tree. We're going to add some stuff between that and the texture.
Shift+A Vector Math node, and jam that between your Position and Image Texture. It will default to Add, keep that. By changing the X and Y positions on here, we can see our PNG moving around. Next, Shift+A > Vector Math node ONE MORE TIME, and put it right before your Add node. Change this one to Scale, and then play with your scale. At 0.5, I had a pretty decent sized Shadow that I felt I could work with. I then used the Add Vector Math node to try corralling our boy directly into the Center here.
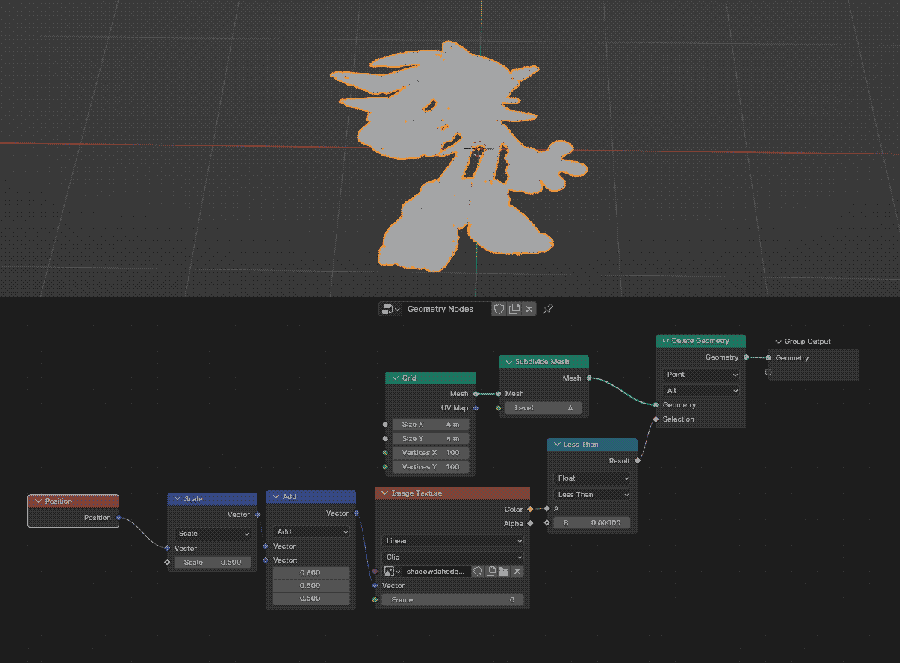
The node tree so far. We're actually almost done!
Now for a fun bit of math. In the case of Shadow here, he is NOT a square: either as a guy or as an image.
To make this make work, we want to find the dimensions of our image (pretty easy if you just click on the image itself). Shadow here is 270 x 370.
Take your Width and Divide it by your Height.
For me, this results in 0.7297297297297297297297297. I'll round that up to 0.73.
Now in Blender, I'm going to Shift+D my existing Vector Add node to duplicate it, then place the copy before the Scale node, but after Position.
I'll then change it from Add to Multiply.
Now I take my cool number I just calculatored (0.73) and place it in my X axis.
Cool, now Shadow is his lanky ass self again. Keep in mind you'd want to put your number in the Y axis if it was larger Width rather than Height.
Next, let's extrude this mesh out so it isn't a paper doll.
Shift+A Extrude Mesh Node, and place it right in between the Delete Geometry Node and Group Output.
Uncheck [Individual], and lower the Offset Value directly above it to make it a bit thinner. I went with 0.05.
Now if we look underneath it, we'll see it's hollow. Let's fix that too!
After Extrude Mesh, Shift+A > Join Geometry node,then grab another line from your Delete Geometry's Output, and drag that into the Join Geometry node as well.
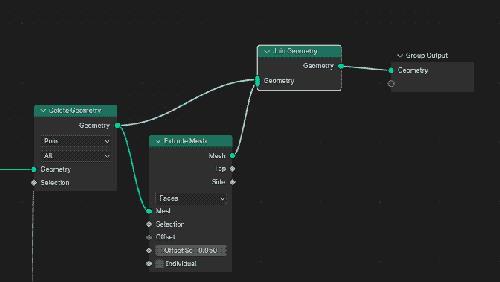
Just like this!
The only problem that you'll encounter now, is tossing a shader on this sucker is going to give us some fucky looking renders.Our normals are flipped! Let's automatically unflip them.
Shift+A > Flip Faces, place that bewtween your Delete Geometry and Join Geometry nodes.
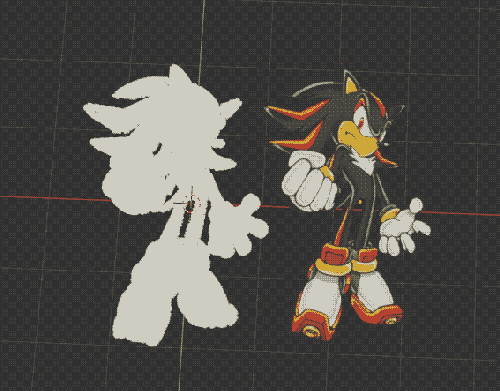
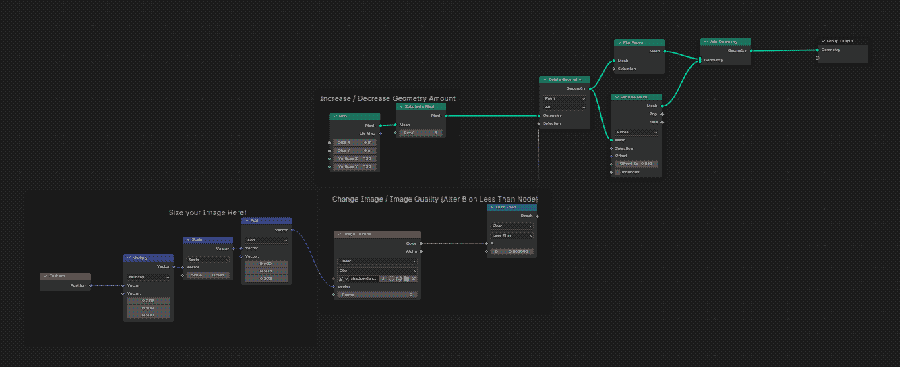
There you go!
Here, in case you're like me and got distracted within the first few sentences, I've included an annotated Blender file of just the Geometry Node set up for you to poke around / input your images in. Okay bye love you.
----~~oOo~~----